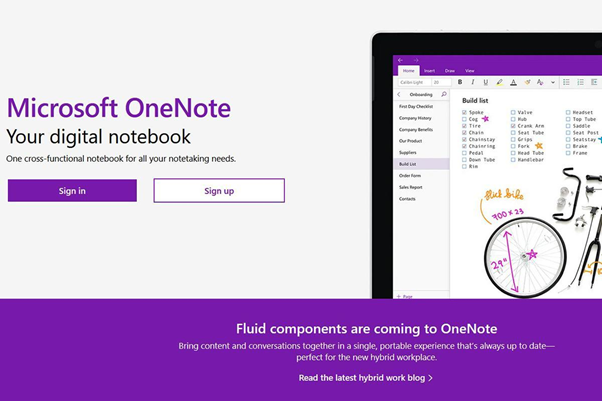
Skip to the main content.

Our client portal provides all the tools you need to create, view or update your support requests. 


For urgent IT support during business hours, or if you suspect anything suspicious call  01314528444 for the fastest response.


If one of our team has asked you to start a remote control session on your computer, use the remote control menu option above.

5 min read

How to sync Microsoft Teams and SharePoint files to your Windows PC

A comprehensive guide to syncing your Microsoft 365 cloud files to your Windows computer.


Introduction

Quickly accessing and working on cloud files online or offline is important for productivity. That's why many choose to sync their cloud files from Microsoft Teams, OneDrive, and SharePoint to their PC's. Syncing files shows them in your Explorer window as if they were saved locally like most people are used to.

Syncing files to your PC also means that you no longer need to worry about where each file is stored. With Microsoft offering the three storage solutions it can be tricky to remember where your files are. Understanding what each service is designed to do is helpful, even if syncing then removes the complication.

Learning how to stop syncing is almost more important as you can accidentally end up deleting all data for everyone if you don't follow the correct process.

This blog will explain the three different services, and guide you through the process of syncing data from Teams and SharePoint to your Windows computer, explain how to stop the sync, and highlight potential issues when working offline.

Understanding Teams, OneDrive, and SharePoint

Microsoft Teams, OneDrive, and SharePoint serve distinct purposes but have some overlapping features. 

OneDrive

  • Think of OneDrive as a personal locker in the cloud. It's primarily for individual use - storing personal drafts, documents, or files you're not ready to share.
  • Confusingly, it is also the mechanism by which you sync files from Teams and SharePoint to your PC, and where you go to stop syncing them.
  • OneDrive has this icon in File Explorer (the yellow and blue folder icon ).
  • OneDrive can automatically back up all your content in your Documents, Pictures and on your Desktop.

Teams

  • Teams is for document collaboration between teams. This is for documents that are regularly shared between colleagues.
  • Teams folders are shown under a different icon in File Explorer .
  • You can only sync Teams that you have permission to access.
  • Teams has also offers chat and video call functionality, separate from the document collaboration features.

Sharepoint

  • SharePoint is similar to Teams and they are heavily linked. Every Teams site has a SharePoint site, but not necessarily the other way around. SharePoint has more advanced features and capabilities. Teams has a simplified document management view, whereas SharePoint has more complex but customisable document-sharing features.
  • Since there is a link between SharePoint and Teams there can be confusion. Particularly when looking at Documents.

    There are two sections in SharePoint:
    • The "In Channels" section is the Teams section of a SharePoint site.
    • The “In site library” is the SharePoint section.


Syncing files to your Windows computer

It's easy to sync data from your cloud service to your PC. It makes finding, and working on documents much easier and more familiar.

Follow the steps below to start syncing your files from wherever they live in the cloud. 


Choose what to sync

You can choose to sync individual files, folders, or top-level channels. What you choose to sync will depend on how you work and what you need to access regularly.

If you are not tight for space on your device we recommend syncing an entire channel where possible to allow for saving new documents that you create directly into your structure.

To do this, make sure that when you locate your file using one of the methods below, you then navigate up the tree to the highest level. In Teams for example you would look for the level called Documents 

how to sync cloud files to pc - top level


Syncing from Teams

While Teams itself doesn't directly sync files to your computer, it integrates with SharePoint and OneDrive to make this possible. Files shared in Teams are stored in a SharePoint document library or OneDrive, depending on the context.

  1. Open Teams and navigate to the channel with the files you want to sync.

    There are different ways to do this depending on which view you are using in Teams - Combined or Separate.

    Combined View
    If you are using the new Combined view in Teams click Chat down the left-hand side, scroll down until you locate the Team and Channel you need.

    how to sync cloud files to pc - teams new view

    Separate View
    If you are using the older Separate view in Teams, look for Teams down the left-hand side, and locate the Team and Channel you need.

    how to sync cloud files to pc - teams old view

  2. Click on the Files tab within the channel.
  3. Select Sync from the menu.

    how to sync cloud files to pc - teams
  4. Follow the prompts to sync the files using OneDrive for Business. The document library will be synced to your computer and can be accessed through File Explorer.


Syncing from OneDrive

  1. Open OneDrive in your web browser.
  2. Sign in with your Microsoft account if prompted.
  3. Navigate to the files or folders you want to sync.
  4. Click the Sync button at the top of the page.

    how to sync cloud files to pc - OneDrive
  5. Follow the prompts to sync the files using OneDrive for Business. The document library will be synced to your computer and can be accessed through File Explorer.


Syncing from SharePoint

  1. Go to the SharePoint site containing the documents you wish to sync.
  2. Navigate to the document library.
  3. Click on the Sync button.

    how to sync cloud files to pc - sharepoint
  4. Follow the prompts to sync the files using OneDrive for Business. The document library will be synced to your computer and can be accessed through File Explorer.


Stop syncing files to your PC

When you no longer want synced data on your computer you must follow the correct process. If you simply select the files that are synced to your computer and delete them, this will delete the files for everyone.

Before deleting synced files you need to stop the sync between your computer and the cloud. Only then are you safe to delete the files on your device.

To stop syncing files from Teams, SharePoint or OneDrive follow the steps below:

  1. Open the OneDrive app (regardless of where the files live in the cloud) on your Windows computer by clicking on the OneDrive cloud icon in the taskbar.

    how to sync cloud files to pc - onedrive icon
  2. Select the cog icon and select Settings.

    how to sync cloud files to pc - unsync 1
  3. In the Account tab, find the folder or library you want to stop syncing.
  4. Click Stop sync next to the corresponding entry.

    how to sync cloud files to pc - unsync 2
  5. Confirm your choice if prompted. This will stop the sync and remove the files from your computer without affecting the cloud copies.


Potential pitfalls and resolving version conflicts

Working on synced data offline can lead to conflicts, especially when multiple users are collaborating on the same documents. Here are some common issues and how to resolve them:

Accidental deletion of files

If you delete files that are synced to your computer they are also deleted in the cloud for everyone. This can cause significant problems when people try to tidy up their device.

Resolution: Follow the steps above to stop syncing your files before you delete them.

Version Conflicts

When two or more users edit a document offline and sync it back to the cloud, version conflicts can occur. This results in multiple versions of the same document, making it difficult to determine which one is the most recent and to know what should be kept.

If you intend to work on a collaborative document offline you should discuss this in advance with your fellow collaborators. Try to agree on specific areas of the document that you will work on as this will make it much easier to merge the changes if you end up with different versions. 

Resolution: If you do end up with conflicting versions there are several options that are available to resolve the conflict.

  1. When you look at the synced file in Explorer, you will usually see it marked with a red icon.
  2. Right-click the file and select "View Online".
  3. Open the document in the online version of Word, Excel, or another Office app.
  4. You will be presented with the different versions of the document. Compare the changes made in each version.
  5. Decide which version to keep or merge the changes manually. Save the final version to ensure that everyone has access to the correct document.

Conclusion

Syncing data from Microsoft Teams, OneDrive, and SharePoint to your Windows computer can significantly enhance your workflow, allowing you to access and work on files even when offline. However, it is essential to be aware of the potential pitfalls of deletion without stopping sync, and of version conflicts, and know how to resolve them. By following the steps outlined in this guide, you can efficiently manage sync processes and collaborate seamlessly with your team.

Next steps...?

If you'd like assistance setting up and managing your Microsoft 365 environment from our Edinburgh-based experts then get in touch with us today.

11 tips to make the most of Microsoft Word

1 min read

11 tips to make the most of Microsoft Word

Microsoft Word is an indispensable part of most business environments. It has numerous features that can help you boost productivity. Microsoft Word...

Read More
Microsoft Teams(work) makes the dreamwork

Microsoft Teams(work) makes the dreamwork

Become more productive and collaborative An introduction to Microsoft Teams, the productivity and collaboration platform included with Microsoft 365...

Read More
How to turn on Out of Office in Microsoft Outlook

How to turn on Out of Office in Microsoft Outlook

Follow our simple guide to turning on automatic notifications in Outlook

Read More